Monday, August 17, 2015

Testing, testing...to further one's art

It's tempting to dive into art supplies and just start creating willy-nilly. And if that works for you, by all means do it. For me, it has often led to frustration and an awful feeling of utter failure...not to be melodramatic or anything. The sage advice to make value plans, color studies, technique samples, and so on has not been my usual procedure. Now that I'm back in art school (the home school variety) for the last few months, my studio contains a growing pile of test pieces. 

The general goal is to figure out a way to combine drawing, painting, and fabric to make artwork using reality as a jumping off point for improvisation.

Making color charts has been very useful. This one is for my stash of Neocolor 2  water-soluble wax crayons. Other media that can work with fabric with varying results include Inktense pencils, water soluble colored pencils, acrylic paints and inks, pastels, and so on.

Here are a bunch of samples...don't like most of these except the close up of the jaguar eye. One of the criteria beside my liking how something looks is was it fun to do? There's no point in coming up with an approach that is totally tedious, for example, given my attention span. Yet, I'm also not interested in something that looks like it took five minutes and demonstrates little skill.

Another batch, am liking these better. In general some samples utilize Lutradur (non-woven polyester), some are typical quilting cottons, also have experimented with paper laminated onto fabric. Some are collaged with acrylic gel onto panel, others are sewn together like a quilt. Re the quilted ones, I've decided the "puffy" look is not working so instead of cotton batting have tried felt, interfacing, and (my current favorite) flannel.

An important factor has been to be as open-minded as possible and question every assumption about what my art can/should be, what materials to use, and what form will it take. I've made a lot of progress but as always am impatient to get on with it and just make art. 

There does happen to be a piece in progress that I'm excited about, so if it doesn't get permanently mired in the proverbial ugly phase, it will appear in this blog soon. Happy creating!

Sunday, November 9, 2014

Pumpkin Art Quilt Demo

© 2014 Loreen Leedy
While browsing for produce in my favorite store in early October, I rounded a corner and found heaps of bright orange pumpkins. It was a striking display and later I couldn't resist making one with fabric. In addition to using paint, the idea was to render the pumpkin without laboriously cutting fabric shapes to create the image...but how?

A orangy yellowy batik with leaves seemed like a good starting point. This is actually the reverse with some of the paint showing through but it gives the general idea. Some reference photos helped with making a same-size sketch on tracing paper. I lightly drew it on the fabric with a white chalk pencil (or possibly regular school chalk, can't recall.)

The scribbly pencil lines on the the right side of the sketch are where the darker values will go. 

Rectangular chunks of fabric were arranged either randomly or with some values placed with the light source from the upper left. The rectangles were glue-basted in place. Then the lines were painted with black acrylic using a pointed round brush. The acrylic bled a bit on some of the fabrics but it was in keeping with the casual look. 

In order to separate the pumpkin from the background, acrylic paint was applied. First the black lines were masked off with torn-edged paper tape. It's a low-tack white paper tape, no idea if it's still being sold (this stuff has been rattling around in my studio for YEARS.) In any case, it worked well to protect the line work. The paint was applied with a scrunched up piece of waxed paper, which gives a nice random texture. The pumpkin gained a cream-colored "glow" and a plum shadow. It looks good but another time I may skip that step.

With the mask removed, the emerging pumpkin requested a few more chunks of fabric. The edge of striped fabric at the bottom was tinted orange and the stem got some brown lines. Love the stripes. Stripes make me happy!

It's always helpful to desaturate a photo to look at the art in grayscale to determine if there is enough contrast. Looked good to me.

Batting and a backing were pinned to the top for the quilting stage. In order to preserve the irregular blocky edges, the stitches stop about a half inch from the edges. The stitching consists of free-motion straight and zigzag stitches, mostly. I haven't decided how to mount this yet...on a stretched canvas? On a plain quilted support?

The balance of realism and abstraction works as I had hoped in this piece, which is nice. One minor complaint is that the style of the line work is somewhat old-fashioned...perhaps "retro" is a more positive way to look at it. Being hypercritical of lines is an occupational hazard of being an illustrator, alas. Also, the bluish chunks look a little out of place. There are some blue tones in the thread but from a distance that doesn't show. Then again, maybe it would be boring without the blue. If I really wanted to it would be fairly easy to cover up the blue with different fabric, but it's not bothering me enough at this point.
© 2014 Loreen Leedy
So that's the story of this pumpkin, hope you enjoyed it!

Loreen


Monday, October 27, 2014

Fruit Frieze Art Quilt, Step-by-Step

This space above the kitchen windows has been calling for artwork ever since we moved here...has it really been almost 11 years?!?

The vintage 70s-era stained glass chandelier provided the fruit theme so next I made a sketch
The fruit is big and cropped along the top and bottom to fill the art with a variety of colors. The original concept was to make several individual pieces mounted on canvas. After thinking about it, one wide, continuous banner made more sense. I taped together pieces of tracing paper along a long hallway and drew the fruit freehand.

Next the background pieces in medium and light tones of cyan blues were overlapped about a 1/4 inch and sewed onto the batting and backing. All of the fabric except the binding is left raw-edged, by the way. I transferred the tracing paper sketch using white Saral paper and blue removable pen, then painted the black outlines with acrylic paint. Painting directly is a tad nerve-wracking, as you can imagine. Then I washed on the basic colors of the fruit, often thin enough to allow some of the blue background fabrics to come through.
Because the piece was so wide (over 8 feet), it had to be rolled up and worked on in segments, starting on the left edge. There actually is a countertop in the room that would have been long enough but for reasons that escape me now, I didn't use it. Too much clutter, no doubt.

This middle section shows the red apple, bananas, and a peek of the strawberries after being painted then additional fabric added. To keep the fabric pieces in place I use thin basting glue, not fusible. Fusible is good on occasion but can be overkill and kind of a pain, what with the accidental ironing on the wrong side, etc.

Here is the apple close up. Hope these photos are okay...they were taken with my iPad, which is not very high-res. Some machine quilting is visible plus some hand-stitching with perle cotton.

The binding is made with various black on black fabrics. It was tough to photograph the whole frieze in place because of the lighting but this should give a reasonable idea. The vivid colors are a big improvement for the decor. The quilt has two sleeves on back with a break in the middle to leave space for a third nail. I used a piece of wood molding for hanging but it's not quite thin enough and causes a minor bulge. The plan is to replace the wood with aluminum bars which have been sitting in the garage for a month or two or three...

Here's another, rather extreme angle.

I'm happy with it and particularly like the plaid and checked fabrics. One thing that slipped my mind was the shrinkage caused by machine quilting. The width is about a half inch less on each end than I had planned, but nobody would know that. Except you, so please don't tell.

Some of my longtime readers may have wondered what happened to me since there have been no posts on this blog for three years. The main reason has been too many things to do and not enough time and energy to keep up with everything. So no worries, and I hope your artistic endeavors are going well. 

If you have any fruit-themed art you'd like to share, please feel free to post a link in the comments.

Loreen


Tuesday, July 26, 2011

The 2012 Quilting Arts Calendars are in!

They came in the mail recently and look wonderful. The animal theme inspired beautiful work...check out Miss Isabella, by Jill Packer:
My grey fox is the December image and can be seen in this post. The calendars are $14.95 and can be ordered from the Interweave online store.

Monday, May 30, 2011

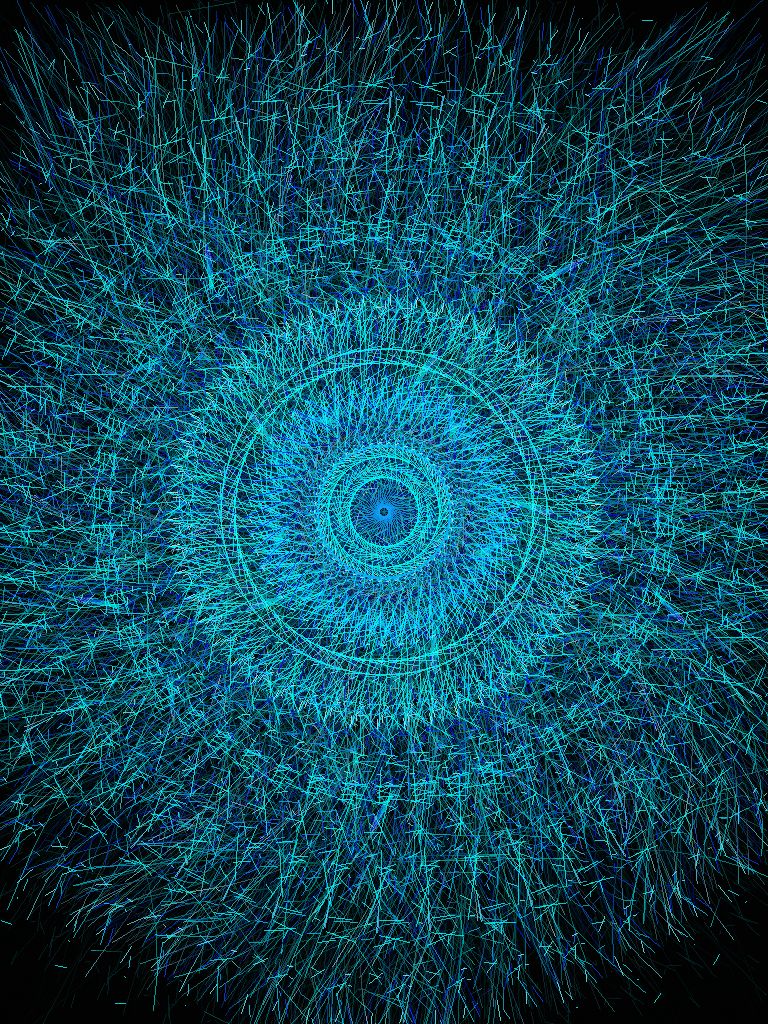
Uzu: an amazing art + mesmerization app

What is this gorgeous image, you ask? It’s a screenshot from an app called Uzu, available on the iTunes store. It’s only $1.99 and has already provided hours of enjoyment for me and anyone else that wanders by. It’s hard to describe how it works, so check out this video:

Here are a couple more images I’ve swirled into existence:
I’m almost finished with a picture book called SEEING SYMMETRY plus I bought an iPad 2 last month...that’s how I ended up with the Uzu app. By adjusting the controls, you can get the image to freeze when you take your fingers off the screen. It’s one of those apps you just have to get your hands on to see what it’s really like.

The images often have a textile-like quality... depending on the options you choose, they may consist of thin lines that look similar to thread. At other times there are little dots or wider strips that move, pulsate, explode, and otherwise dance along with your finger movements. Enjoy!

Friday, April 1, 2011

A quick Adobe Illustrator Live Trace tutorial

My uber-talented artist friend Joyce Shelton asked me about using the Live Trace feature in Adobe Illustrator. Thought I knew how to do it... ummm... now I do! It allows you to convert a scanned drawing to vector lines. There are many advantages to vector art, one being that you can enlarge it basically infinitely without losing any resolution. So let’s use some of Joyce’s art to see how it’s done:

Her original was drawn with ink, but a pencil drawing is okay, too.

Scan art into Photoshop or similar program with 300 ppi resolution. The scan Joyce sent me was actually too low res, but it worked anyway.

If artwork is in pencil or otherwise lacking in contrast, use Levels to make it more black and white without losing too much detail. Save in psd, jpeg, or tiff format (others may work, but I haven’t checked them all.)

In Illustrator, open a new document and use File> Place to get the pixel artwork in there. If for some reason that doesn’t work, use Select All, then Copy (in Photoshop) and Paste into Illustrator.

Use the black arrow tool to select the artwork if it isn’t already. Go to Object> Live Trace > Options and a dialog box will open.

Put a check in the Preview box (on the right side in CS4, anyway). Tweak the various controls while looking at the image, which will update as you change the settings. Here are the settings I used:

To look at the original artwork again for comparison, uncheck the Preview box, then check it again if you want to make more adjustments.

Note that the Ignore White box is checked. This way you don't get all the white paper turned into shapes, which are a royal pain to get rid of.


Once you get the settings the way you want them, you can save as a Preset to use it every time, if desired. Even so, you might have to tweak the settings for each drawing.

Click on Trace and dialog box will close. Go to Object> Expand and the artwork is now all converted to paths. If desired, you can adjust the lines with the various tools in Illustrator.

By default, the black lines are all Grouped so when you select a part with the black arrow, the whole thing is selected.

Copy and Paste into Photoshop. Select Paste as Pixels then hit Return to complete the Paste. If desired, add color in Photoshop.


The image shows a detail of the converted artwork, with yellow behind it so you can see the white is gone. It doesn’t give an exact copy of the original line work, but it looks pretty good, and is much, much faster than trying to draw similar artwork from scratch in Illustrator.

Hope this makes sense, let me know if you have any questions. Happy Live Tracing!

Friday, March 18, 2011

Book reviews: art quilts, bead embroidery, making glass beads

It’s long past time to catch up on some book reviews, so without further ado:

Twelve by twelve is a beautifully designed book that arose from a challenge group of a dozen artists who created one 12" X 12" art quilt every two months over a two year period (Thanks to Gerrie Congdon for straightening me out on the time factor). The themes varied from Water to Shelter to Mathematics.

There are comments from each artist, detailed photographs, works in progress, studios to see, discussions of techniques, and much more in this 176-page book. As you can see by the cover image, some of the quilts have non-objective imagery, many are abstract, some are more realistic.

I’ve made a few quilts this size for the Quilting Arts calendar contests and for auctions to benefit SAQA and it is a good size to work with. However, making the commitment to creating so many so consistently is way beyond me... hats off to these artists for getting it done!


My only complaint about Sherry Serafini’s Sensational Bead Embroidery is that the cover image doesn’t begin to do justice to this artist’s glorious work. It's an odd view of a bracelet and all that darkness looks gloomy, while her beaded pieces are a delight to the eye. Check out her web site to get an idea. And don't miss her handbags, they are amazing.

I’ve been a fan of Sherry’s (along with a zillion other beaders) for years, mostly from seeing her work in Bead & Button magazine. Have only attempted some small pieces, but love the technique. It allows you to turn humble seed beads along with a few stones, jewels, or Scrabble tiles into gorgeous one-of-a-kind colorful, textured jewelry.

There are 25 projects in this book with clear directions and supply lists and good closeups of the beaded earrings, brooches, rings, bracelets, and necklaces that show the details. There are projects for all levels of experience.

Creating Glass Beads by Jeri L. Warhaftig is designed as an intermediate level workshop, so beginners should probably start elsewhere. However, the tools and materials for the craft are well covered. Each “session” takes the reader through the process of making a project such as a pendant with gold leaf, an eye bead, and an intriguing combo of glass and silver “clay.” At the end of each session are numerous examples made by students plus a gallery of other professional artists’ beads made with similar techniques.

Making glass beads is a craft I admire but have avoided due to the use of actual *fire*...but if I ever dare to try it this book will be an excellent guide to exploring different techniques. After learning the basics from a very patient teacher, first.


It’s been fun being on Lark Crafts reviewer list, they publish some very inspiring books!

Tuesday, February 15, 2011

What is my 2012 calendar animal, you ask?

My entry was accepted into the 2012 Quilting Arts calendar, so WOOHOO! There has been a hilarious debate on my Facebook page about what animal it is based on only a section of the face. It’s been a good example of the power of the human mind to extrapolate on available information. Guesses for the image shown at left have ranged from lion to bloodhound to monkey to horse to bunny to goat to llama to emu to owl, and even pig or elephant! Then there was prairie dog, but that was a joke (I think!)

The closest guess (without hints) was wolf. But it’s not a wolf.

Without any further ado, here is Cautious:
It’s an animal that I’ve never seen before in person, but one day this little gray fox was investigating our bird-feeding station, and by sheer chance I happened to look out the window. The fox’s coat was beautifully glossy, and it had a full, bushy tail. The neck and ears were reddish, the rest was silvery gray. After grabbing my camera and snapping a few photos, I tapped on the glass and got this view. One of the fun characteristics I found out while doing research about gray foxes (but not red foxes) is that they like to climb trees!

Here is my post about making this artwork. And this Wikipedia page has some nice photos of gray foxes and more info.


Friday, January 21, 2011

2012 Calendar

Woohoo, I'm happy to say that my entry has made it to the finalist stage. Showed my critter’s right eye last time, so here’s the left. Guess I’d better sew that sleeve on now...

Update February 14: It’s in the calendar...so yay!

Saturday, January 8, 2011

Watercolor pencils on fabric

My first completed project this year is for the 2012 Quilting Arts Calendar... might as well try for three years in a row! The theme is Feeling Pet-ty, in other words animals, a lifelong favorite subject of mine. The previous entries had fairly bright colors but the subject this time called for a much more subdued palette. I had not used watercolor pencils on fabric before, but because they are transparent and the idea was to allow the patterning on the fabric to show through, wc pencils had potential.
First, a little organizing was in order. These pencils date from a book project eons ago and were scattered about in various nooks and crannies of my studio. After corraling them into a semblance of order, a coloring chart became essential because of the nature of wc pencils. It’s very hard to tell just looking at the pencil what color it really is.
As you can see on the left, the colors change drastically when water is added.

Because I was not going to use plain white fabric, the pencils would be interacting with the underlying color and/or pattern. The fabric needed to represent the fur of my critter, without getting literal, necessarily. Below are the four contenders:
The one on the left was a possibility, the next one was too spotty, the next one too contrasty... the one on the right with it’s pattern of leafy, woodsy imagery seemed most promising. So, I scribbled on some colors (below) and brushed over them over with water. So good so far, time to jump right in.
The sketch was done in Photoshop, won’t get into the details of that now. Once it was printed out, I redrew it onto tracing paper. Someone had asked me awhile ago about my unusual method of transferring sketches, so here are some photos. The tracing paper sketch is on top, and I just draw directly on the fabric underneath. The pencil point is visible through the tracing paper.
I roll back the tracing paper often to see how it’s looking.
Also, it’s easy to see through the tracing paper where the pencil is because it is darker.
This method isn’t suitable in every situation, but because I was using a dark wc pencil and a thick line, it worked fine. Why not use transfer paper such as Saral? I do on many occasions, but this works just as well for me and there are no worries about a Saral line ending up in the wrong place and being tough to remove. How about a light box? That’s a good option if the base material is see-through enough. But, if you’re transferring a sketch to primed canvas (for example), a light box won’t work.

Below is the colored line before and after being washed over with water. Quite a difference! You can always add additional layers of the pencil, if needed, after the fabric is dry. Or, you can use the pencil on wet fabric, which really lays down pigment but may be a tad less controlled. By the way, in this case the amount of water being added is just sufficient to melt the wc pencil, not saturate the surrounding area.
How about setting the wc pencil? I tried ironing it, which didn't seem to do anything much. A wet tissue dabbed onto the pencil work is an easy test of whether the pigment is set or not. Painting on thinned acrylic gel, textile medium, or Jacquard colorless extender (tutorial with wax pencils here) probably would have worked but since quite a bit of the image was involved, there was too much territory to cover. Instead, it was sprayed with two coats of Claybord matte fixative. This is the main fixative I use, because it has a relatively low odor that dissipates quickly. As you can see from the eye detail at the top of this post, there was another whole layer of stitching to add, so I didn’t want pigment from the pencils to get all over the threads or have to keep smelling a noxious odor. The other advantage is that is doesn’t stiffen the fabric much, if at all.

The watercolor pencils gave me the soft look I wanted, so that was the main thing. Wondering what this animal is? If it doesn’t get into the calendar, I’ll reveal all in a couple of months. If it does get in, I’ll post more about this project closer to the calendar’s release date.

Happy New Year, everyone!


Wednesday, December 1, 2010

Inspired Ideas: The Christmas Issue

Inspired Ideas is an online ezine I just found out about via Elizabeth Dulemba’s blog. It has 168 pages plus an appendix... click here to check it out:
It’s full of creative and unusual craft projects such as a Christmas village made of recycled cereal boxes, a yarn ball wreath, cookie cutter jewelry designed by a gallery of crafters, artists, and bloggers including Mary Engelbreit. The brainchild of Amy Powers, it is an impressive example of innovative publishing... and it’s free!

Happy browsing!


Saturday, November 27, 2010

Whimsical bird in progress

It’s been awhile since I’ve posted about the LIQ project but never fear, progress is being made ever so slowwwwly. Above is the rough sketch of the bird drawn in Photoshop for size and placement in the larger scene... the plan is to refine her when the bird is actually constructed. Sometimes I make a very precise sketch but in this case it seemed reasonable to wing it (pun intended.)
My original theory was that the bird would be some shade of blue with a red belly, but a dotted violet, orange paisley, and black on black fabrics ended up working out best. You have to keep an open mind! I first tried matching orange and violet points on the wings and tail, but didn’t quite look right.
The striped fabric seen above right had the violet and orange in it plus some other colors that added interest. For the legs (below), I wrapped gold ribbon around black rickrack. The feet are made of interfacing painted with gold metallic acrylic paint. This photo shows more of a bronze color, but the gold ended up working better.
After gluing on the points, I machine embroidered the wings and tail. They are attached at their bases, but left free on the tips to give more dimension. I had sewn the body to the quilted background with a machine zigzag stitch, then remembered there was supposed to be a “swish” behind the bird...oops!
So I ripped out part of the stitching, put the light blue swish under the body, then restitched it. Some simple free-motion-quilting was done on the body, a beak and bead eyeball was added, plus some beads along her belly.
She’s carrying a piece of fabric back to her nest, in case anyone is wondering.