Showing posts with label drawing. Show all posts

Thursday, September 10, 2009

Love the new Illustrator blob brush

That is how these plants and the beastie below were drawn. There’s something ironic about using such a 21st century tool to draw prehistoric life.... I’ve never used Illustrator that much despite having it for at least a decade, but it seems the time has come. Photoshop, for all its wonderfulness, just can’t make lines this crisp. Illustrator brushes have an adjustable “smoothing” option that (surprise) smoothes out the wobbles and bobbles in each stroke. I keep the level pretty low and have to redraw some lines, but overall it works wonderfully well to create attractive, swooping line work. You also can make the size vary according to the pressure, and several other parameters.
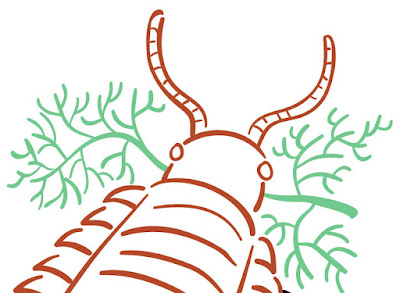
What’s helpful about the blob brush is that it automatically merges all lines that overlap and are the same color. Saves some steps. When you don’t want the lines to combine, the regular brush is the one to use. One problem I ran into that took awhile to figure out... once you’ve used the blob brush, if you switch back to the regular brush, it won’t work. Instead of the cursor, it shows a circle with the slash through it. You have to open the brush panel and choose a brush tip, then it works again. There may be some other way to avoid this, but whatever works, right?

Next step is filling in and otherwise coloring these in Photoshop.

Tuesday, April 14, 2009

Tracing an image with or without Photoshop

While getting ready for the plein air workshop last week, my friend Joyce showed me a wonderfully concise guide to the activity by artist Tom Brown. Originally created as a handout for his own workshops, he now sells it as a PDF online through his blog. His April 12th post gives the details of what it contains. One of the DIY tools he shows is how to make a simple “viewfinder” to trace the basic shapes and especially the perspective lines when painting outside.

First let’s try it in Photoshop. Here’s a not-very-sharp photo of our kitty Knickers lounging in the guest room. While she loves it when the futon is open, it does get in the way of my quilting activities.
In Photoshop, you simply make a layer on top of the photo and start drawing the lines with a hard round brush. To see how it’s going, turn off the photo layer (click the eyeball). As shown below, I’m not trying to painstakingly copy everything, just do a reasonably good job of capturing the important contours. It’s very easy to get the lines of the futon going in the right directions to create a convincing sense of space. I just noticed that the line of the floor meeting the wall is missing... oops!But what if you are somewhere without a computer? (Horrors!) The ideal thing is to develop the ability to look at a scene and put it on paper (i.e. learn how to draw from life.) But if you haven’t gotten around to developing that skill yet or are in a hurry, try this: get a piece of thin plexiglass at an art supply or hardware store (8" X 10" max) and a dry erase marker. Hold up the plexi, and start drawing. The drawing will be somewhat wobbly, but it still helps you turn the 3D scene in front of you into a two dimensional rendering. In case anyone thinks this is “cheating,” my response would be... so is buying paint in tubes instead of gathering rocks to grind into pigments. Or buying fabric instead of growing cotton and weaving your own. : )

As you can see below, Knickers had moved by this time. For some reason she is highly suspicious of many tools such as rulers, cameras, sheets of foam core, and heaven forbid, the ironing board. Anyway, what do you do with this scribble now, you ask? Use it as a stepping stone to create a drawing in your sketchbook, or if you’re plein air painting it’ll help you place the composition on the canvas, try alternatives, block in the main shapes, etc.
Rather than plexiglass, I actually used a lightweight sheet of styrene from a craft store, intended to make faux stained glass. It would add very little weight to an outdoor art kit, which is always an plus. It would be nice to add a 5-step gray scale, too. At the workshop I discovered that while drawing is not problem for me, mixing the right color AND value of paint was another story. More about that another time.